
1. What Is an Expansion Bolt?
An expansion bolt (also called an expansion anchor, anchor bolt or sleeve anchor) is a fastener that secures itself using a wedge mechanism: as the nut is tightened, the sleeve expands and presses firmly against the walls of the hole, creating friction and clamping force inside concrete, brick or other masonry. Expansion bolts are widely used in building decoration, equipment mounting, pipe supports, air-conditioner brackets, signboard installation and many other applications — one of the most common anchoring methods in both construction and home improvement.
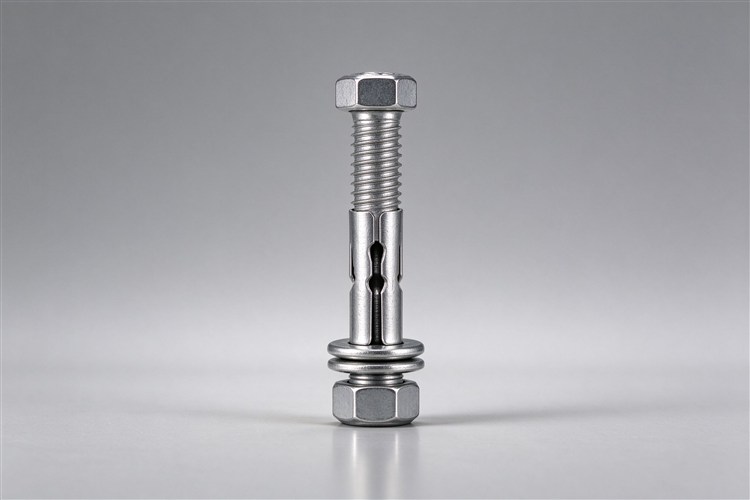
A complete expansion bolt usually consists of four parts: a hex head bolt (provides tensile strength), a metal expansion sleeve (with longitudinal slots that open under load), a flat washer (distributes pressure) and a hex nut (drives the tightening). How it works: when the nut is tightened, the bolt is pulled outward, the tapered end forces the sleeve to open, and the sleeve presses tightly against the hole wall, generating strong radial friction that resists pull-out and shear forces.
2. Common Types and How to Choose the Right Size
Expansion bolts come in many types. By material: zinc-plated carbon steel, stainless steel 304/316, hot-dip galvanized, and more. By structure: standard sleeve anchors, wedge anchors, chemical anchors, internally threaded insert anchors, heavy-duty anchors, and more.
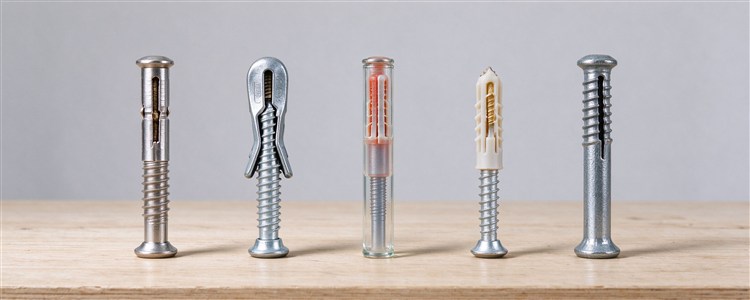
Selection tips: choose the anchor by substrate, load and environment:
- By base material: for solid concrete, use standard sleeve anchors or heavy-duty anchors; for aerated concrete, hollow brick and other porous substrates, use special light-duty anchors or chemical anchors.
- By load: for light loads (ceiling lamps, shelves), choose M6–M8; for medium loads (air-conditioner units, brackets), choose M10–M12; for heavy loads (steel structures, heavy equipment), use M16 or above heavy-duty expansion bolts or chemical anchors, and calculate the safety factor carefully.
- By environment: zinc-plated parts are fine for dry indoor use; for outdoor, humid or coastal areas, use 304 stainless steel; for highly corrosive environments, use 316 stainless steel or hot-dip galvanized heavy-duty anchors.
- Hole depth and edge distance: drill 10–15 mm deeper than the embedment depth to leave room for debris; keep the bolt at least 5× the hole diameter from the edge of the member, otherwise the base material may crack.
3. Preparation Before Installation
Before you start, make sure the following are ready:
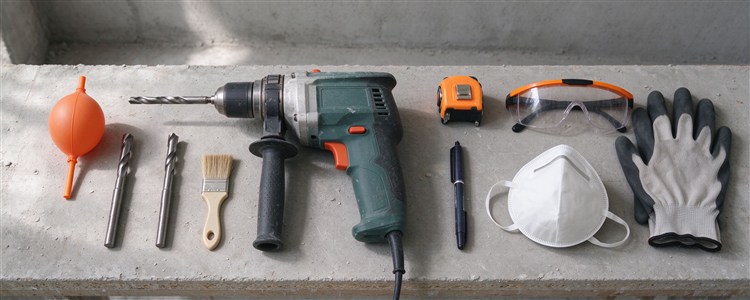
- Tools: a hammer drill or impact drill, a drill bit of the matching diameter, a blow bulb or brush (for cleaning holes), a wrench or socket, a tape measure, a marker, a safety helmet, safety goggles, a dust mask and protective gloves.
- Substrate check: confirm that there are no electrical wires or water pipes behind the mounting position; tap the wall to make sure it is solid masonry, and never anchor directly into hollow, insulated or plastered layers.
- Size confirmation: choose the correct size for the load and substrate — the hole diameter must match the outer diameter of the expansion sleeve, which is the key to a quality installation. For example, an M10 expansion bolt usually needs a 12 mm drill bit.
- Marking: mark the mounting points clearly with a marker; use a tape measure and a level to align horizontal or multi-point fixing.
4. Step-by-Step Installation
Step 1: Drill the hole. Use a drill bit of the specified diameter and drill vertically at the marked position. Drill 10–15 mm deeper than the embedment depth. Keep the hammer drill perpendicular and do not rock it from side to side, or the oversized hole will reduce the anchoring force. If you hit rebar, stop and relocate — never cut structural reinforcement.
Step 2: Clean the hole. This is the most easily overlooked but extremely important step. Use a blow bulb or brush to thoroughly remove dust and debris from the hole, blowing or brushing 2–3 times. Dust left in the hole significantly reduces the anchoring force and can cause the bolt to loosen or even fall out.
Step 3: Insert the anchor. Tap the complete expansion bolt (bolt and sleeve) into the hole by hand or with a rubber mallet until the sleeve end is roughly flush with the wall surface and the threaded end is exposed. If it will not go in, check whether the hole is too small or too shallow — do not force it.
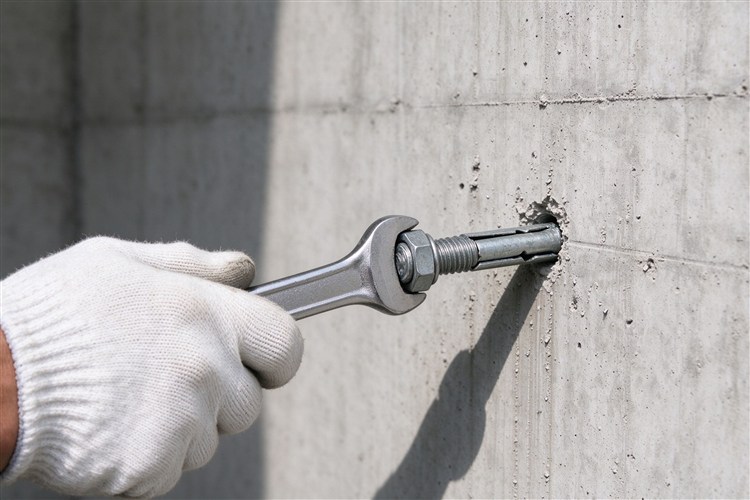
Step 4: Tighten the nut. Turn the hex nut clockwise with a wrench or socket. As the nut turns, the bolt is pulled outward and the tapered end forces the sleeve to expand against the hole wall. Increase the force gradually rather than tightening all at once. When the resistance rises sharply and the bolt can no longer turn, the anchor has fully expanded. For load-bearing installations, use a torque wrench and tighten to the manufacturer’s recommended torque.
Step 5: Check and accept. After installation, shake the mounted item to confirm there is no looseness or movement. For load-bearing installations, carry out pull-out spot checks — for high-altitude, heavy or safety-critical applications, an on-site pull-out test to the relevant standard is required.
5. Installation Tips and Common Mistakes
- The hole diameter must match: if the hole is too large, the sleeve will not expand fully and the load capacity drops sharply; if it is too small, the bolt cannot be driven in, and forcing it will damage the sleeve.
- Never rely on the plaster layer: expansion bolts must anchor into the structural base (concrete or solid brick). If the sleeve only expands in the surface plaster, it will pull out under load.
- Avoid anchoring too close to an edge: if the bolt is too near the edge of the member, tightening can crack the concrete. If the edge distance is insufficient, use chemical anchors or relocate the fixing.
- Do not overtighten: over-tightening can break the bolt or snap the sleeve, especially low-quality expansion bolts with brittle material — tightening too hard makes them fail.
- Be careful on hollow walls: standard expansion bolts have almost no holding power in hollow brick, plasterboard or aerated blocks — use butterfly toggles, plastic toggles or chemical anchors instead.
- Temperature and aging: plastic anchors should not be used in high-temperature environments (near radiators or ovens); check outdoor metal bolts for corrosion regularly.
6. Safety, Maintenance and Buying Advice
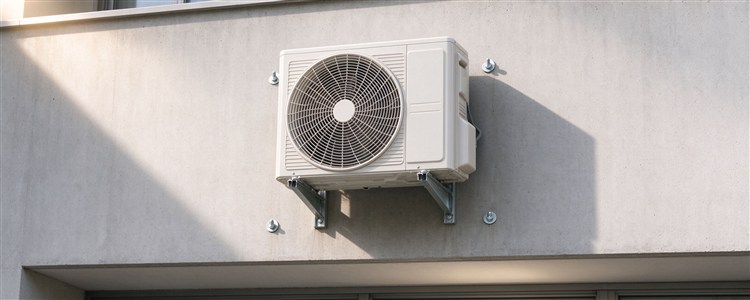
Expansion bolts are single-use anchors. Once installed, they should not be reused after removal — the sleeve is already deformed and cannot guarantee the same anchoring force. For long-term load-bearing points, check the tightening condition every 1–2 years, especially for high-altitude items such as air-conditioner units, signboards and ceiling hangers; replace or reinforce immediately if any looseness is found.
Choosing products from reputable manufacturers is essential. Some low-quality expansion bolts on the market use inferior materials, with thin sleeves, shallow threads and poor plating, and their actual load capacity often falls short of the rated value. For critical load-bearing positions, choose national-standard products with test reports — do not cut corners to save money.
Conclusion: Expansion bolts may be small, but they carry a big responsibility for safety. From material selection, drilling and hole cleaning to tightening, every step determines the final anchoring result. Follow the standards strictly, choose the right size and use the right method — then every expansion bolt will truly “expand” into place and hold firmly.